

One of the stepper motors’ switch things (the metal part that hits the bar to tell the motor it’s at one end of the track) came out and it’s either bent too much or snapped off (it’s so small I can’t really tell) and it doesn’t go back in place, which means I can’t use the printer because the motor with the head on it doesn’t know when it has reached the end of the track and just tries to keep going if I don’t stop it.
My first thought was to print a new piece but… That won’t work when I have to use the printer to do that. The motor itself is great. It’s just that stupid little metal triangle thing used to give the teeny tiny switch some more surface area to be pressed.
I have an Aquila, though I haven’t lost a limit switch yet. The limit switch assemblies (microswitch, PCB, and connector) should be Ender 3 compatible and are therefore like $10 for 5. I wouldn’t really try to get more granular than that on the repair.
I’d probably recommend just finding an equivalent micro switch. They are generally pretty cheap.
Got any photos of the part?
It kind of sounds like you need to replace the microswitch, which is going to be the easiest way to go about it. it’s not to hard- at the worst, you’re going to need to do some easy soldering.
if you can’t find endstops prewired, it’s just a matter of finding the microswitch that fits the form factor- they’re all pretty much standard components.
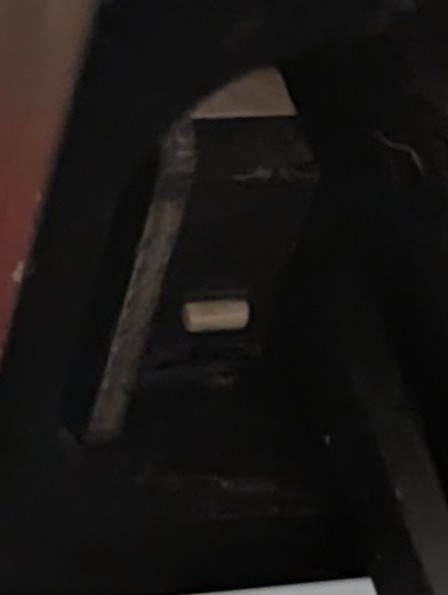
Shit lighting in here but this is the switch anyway. All that broke was a little metal triangle that floats over that white button. Looking at the image now though I think I see why it doesn’t fit anymore. Look how the bottom is all tore up. That’s where it would slot in at :/
So. That’s definitely a micro switch, if you look to the left you can see a spacer/bracket. The switch usually has 2 through holes to screw to that bracket.
If your comfortable soldering, any similarly sized switch will work; but you can probably find replacement parts that are more or less pre-wired and just plug into the board.
You’ll have to adjust the end stop to get the homing correct; but its just fiddly, not difficult
